
Setting up locations and stadium plan
A location is the place where your events take place: your stadium, a sports hall, a venue. If you sell tickets for fixed seats, you also draw the stadium plan. You then use that plan for every event at that location, in the Ticket App and at the box office.
Creating a location
- Go to Settings, Locations and create a new location.
- Enter a name and optionally the address or practical information.
- Choose the pitch: football, basketball, hockey, volleyball, handball, tennis, stage or none. It is drawn in the middle of the plan, also in the Ticket App and the box office.
- Set the location to active and save.
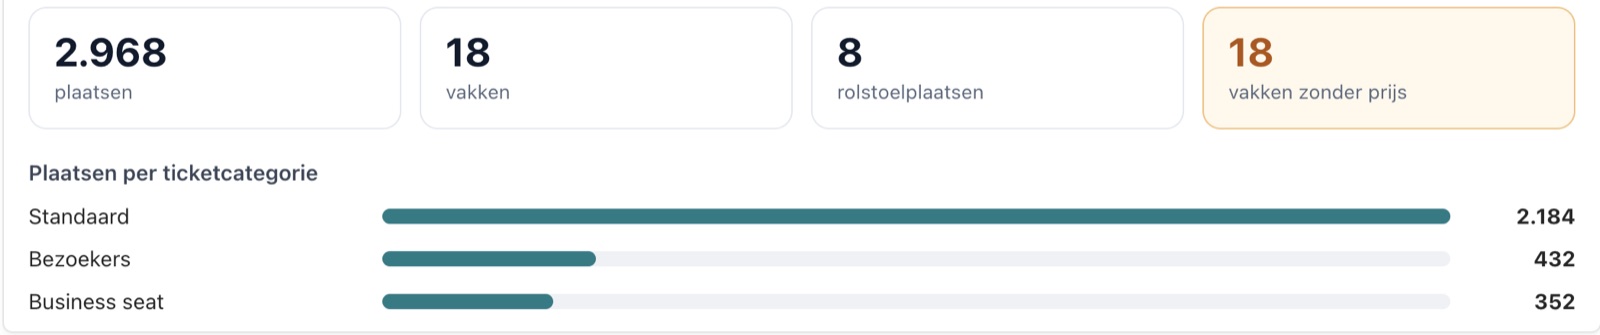
At the top of the record you see the key figures: the number of seats, sections and wheelchair spaces, the seats per ticket category and how many sections are still without a price . That way you don't forget a stand before sales open.
Drawing the stadium plan (Layout)
- Open Stadium plan at the location. You are in the mode Layout.
- Click Add section. Drag the section into place and drag the corners to change the size. Scrolling zooms.
- Give the section a name, the number of rows and seats per row, and choose the ticket category.
- Choose where row 1 is (at the top or at the bottom), where seat 1 starts (left or right) and whether the numbering runs per row or continuously. You put wheelchair spaces at the front.
- If a section is similar to another, use Duplicate. Click Save when you're done.
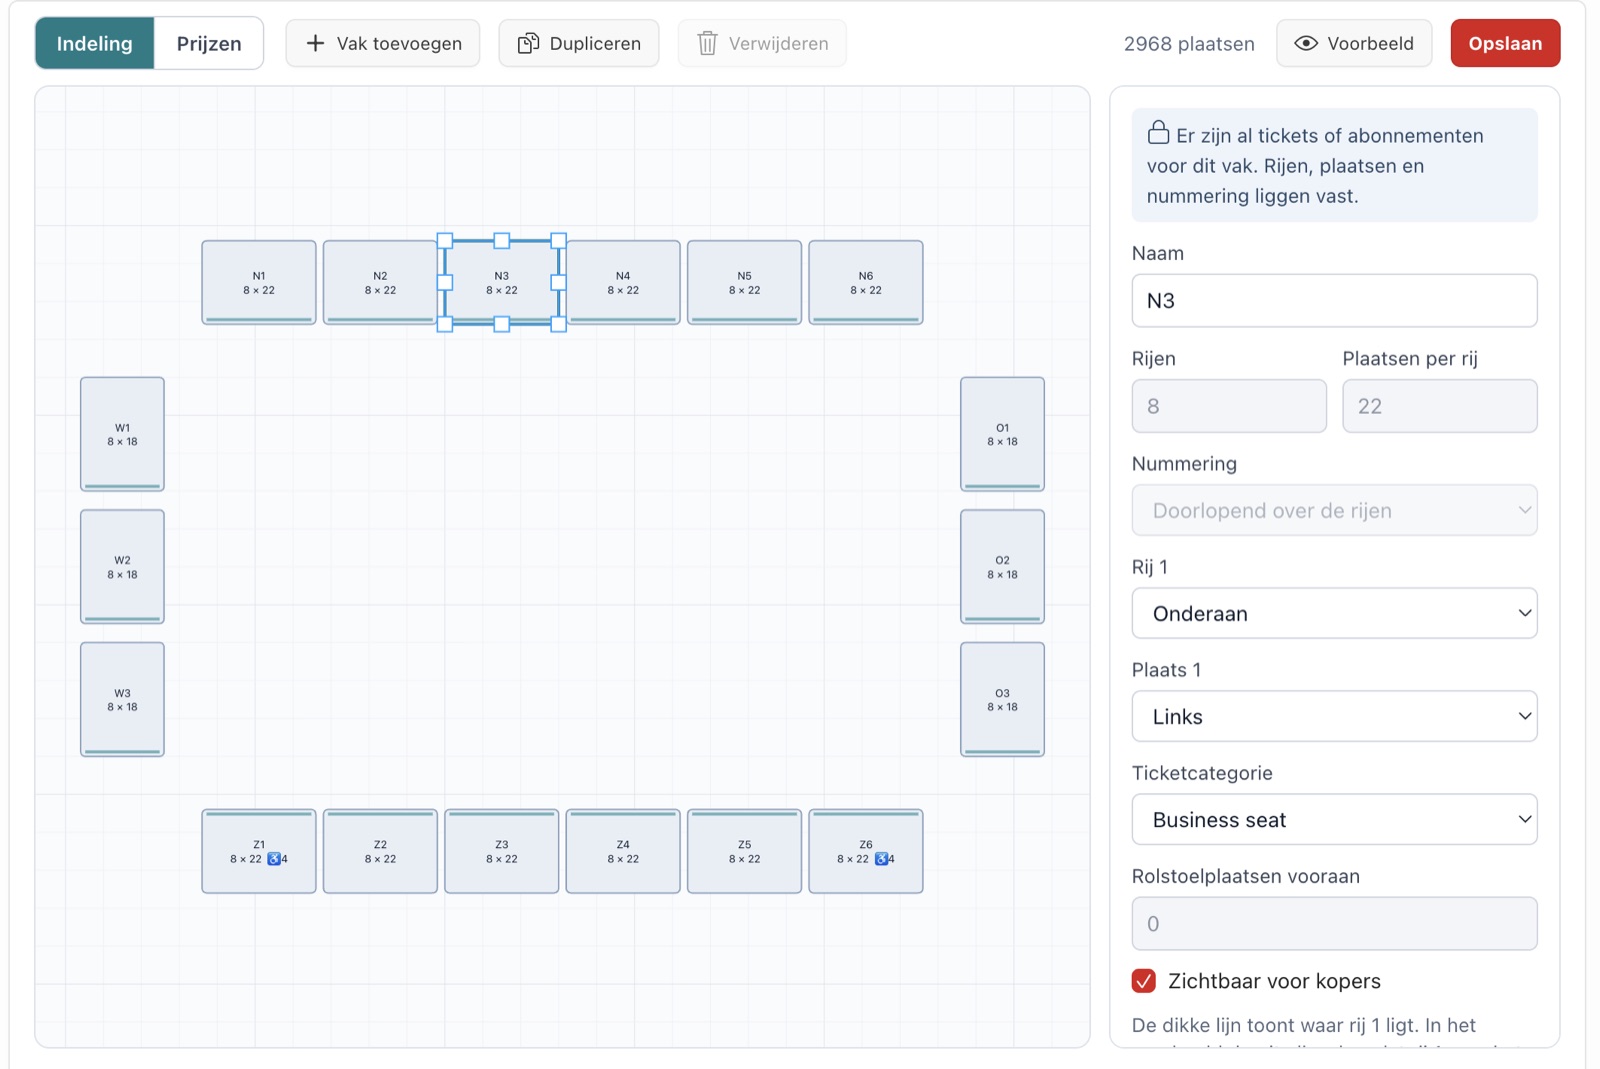
With Preview you see the plan as a buyer sees it: each section rotates so that row 1 faces the pitch.
The prices (Prices)
- Click Prices at the top.
- Choose one or more sections: click, or hold Shift, or choose all sections or same category.
- For each target group (e.g. adult, 12 to 18 years), fill in the price , with the VAT rate and whether the price includes VAT. You add a new target group at the bottom.
- Tick Internal for a target group you only sell at the box office and in the back office.
- Click Apply to ... section(s).
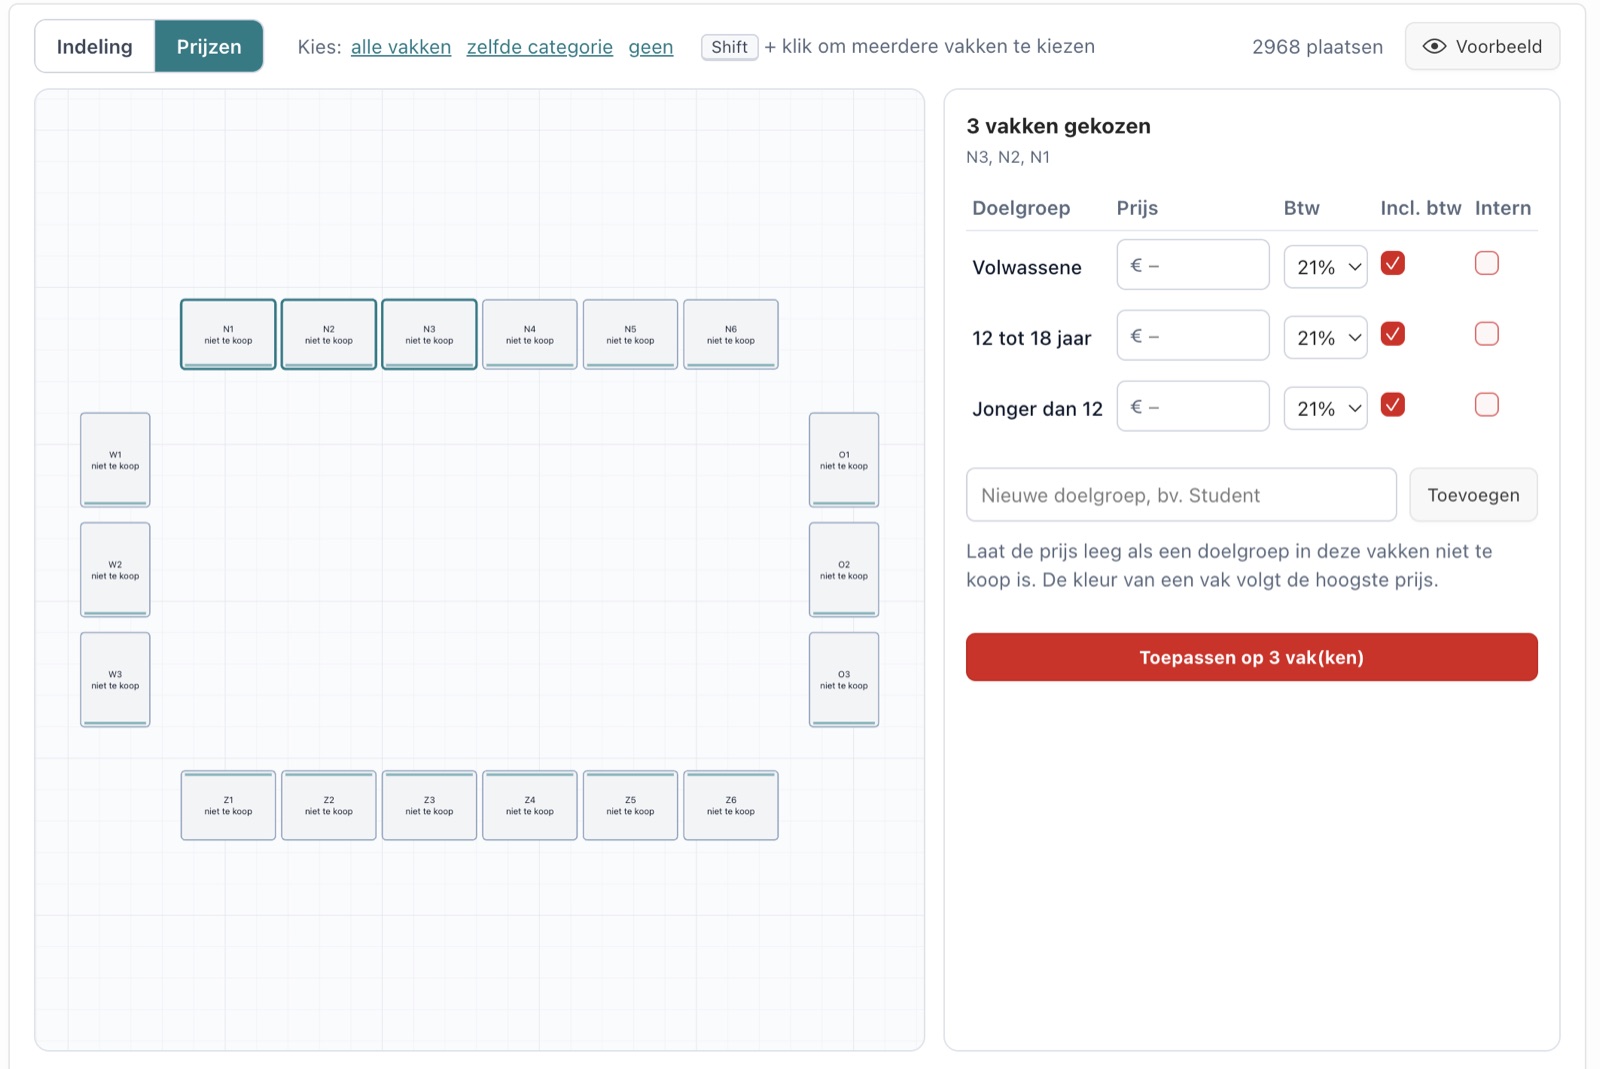
If you leave a price empty, that target group cannot be bought in that section. The prices apply to new events at this location. You can then still adjust them per event.
Did this answer your question?